“HTML on Word V1.2” user’s manual
Preface
"HTML on Word" is a tool that converts docx format files edited and saved in Microsoft Word (hereinafter referred to as Word) into simple and easy-to-edit HTML. You can easily create a web page from a document created through the familiar Word interface.
Word has convenient and powerful editing features for documents, such as document review, style setting such as heading, automatic outline numbering settings, advanced drawing, table creation and easy creation of hyperlinks. That's why Word allows you to create high quality documents with high productivity. With "HTML on Word", you can easily convert documents created in Word to HTML, so you can efficiently create web pages with excellent contents.
This manual explains the features of "HTML on Word" and how to use Word as an HTML creation tool.
The composition of this manual is as follows:
“Chapter 1 Overview" explains what you need to understand before using this product, such as an overview of the features, operating environment, restrictions and user support.
“Chapter 2 Installation and License Settings” explains the installation/uninstallation of this product and the type of license.
“Chapter 3 Command-line Version" explains how to use the command-line version to convert Word documents to HTML.
“Chapter 4 Add-in" explains how to use add-in that are embedded in the Word ribbon.
“Chapter 5 Conversion Specifications” explains the specifications for converting styles set in Word to HTML tags.
“Chapter 6 Word Editing Guidelines” provides guidelines on how to use Word's editing features to create web pages.
Notational Convention
This manual uses the following notation for HTML elements.
- The HTML element type name is enclosed in <>, like a <> tag.
- In the conversion specification, only the start tag to be output is indicated, and the end tag is omitted even when the end tag is output.
- Heading rank tags (<h1>, <h2>, <h3>, <h4>, <h5>, <h6>) are collectively referred to as <h> tag. Note that <h> tags are not HTML element type names.
Contact
If you have any questions about the features and operations of this product, contact us by e-mail.
support@antennahouse.com
Table of contents
“HTML on Word V1.2” user’s manual
Preface
Chapter 1. Overview
1.1 Features of command-line version
1.2 Add-in features
Chapter 2. Installation and License Settings
2.1 Installation procedure
2.1.1 Installation options
2.2 License
2.2.1 Evaluation version
2.2.2 Official license
2.3 Uninstallation
Chapter 3. Command-line version
3.1 Command-line startup message
3.2 Conversion options
3.3 Command line operation examples
3.4 Setting file
3.4.1 Default setting file
3.4.2 Conversion option setting file
3.4.3 Setting file format
3.5 Parameters in the add-in menu
3.6 Error messages
Chapter 4. Add-in
4.1 Add-in installation/uninstallation
4.1.1 Add-in installation
4.1.2 Add-in uninstallation
4.2 “Antenna House” tab
4.3 “Convert to HTML” button
4.4 Convert to HTML
4.4.1 Application to display the conversion result
4.4.2 Changing the conversion destination folder
4.4.3 “Use specified CSS”
4.4.4 “Line break with block tag”
4.4.5 Help
4.5 Error messages
Chapter 5. Conversion specifications
5.1 Original documents
5.2 Version of destination HTML
5.3 Root, head and meta-information
5.4 Block elements
5.4.1 Heading styles and outline levels
5.4.2 Heading outline numbers
5.4.3 Lists
5.4.4 Paragraph numbering and ordered lists
5.4.5 Paragraph style name (optional)
5.5 Figure and figure arrangements
5.5.1 Output folder and file name for illustrations
5.5.2 Image and shape formats
5.5.3 Layout Options
5.5.4 Position to output the figure with “With Text Wrapping” specified
5.6 Formula
5.7 Tables
5.7.1 Table header row
5.7.2 Table header column
5.8 Inline elements
5.8.1 Font group
5.8.2 Links and cross-references
5.9 Paragraph text alignment
5.10 Text box
5.11 Endnote
Chapter 6. Word Editing Guidelines
6.1 Principle of content and style separation
6.1.1 What is web page content and layout separation?
6.1.2 Word is a mixture of content and layout
6.1.3 This product ignores Word layout specification in principle
6.1.4 Things to avoid when creating Word documents
6.2 Output the HTML heading rank tag
6.2.1 Set the Word heading style
6.2.2 Set the title
6.2.3 Set the paragraph outline level in Word
6.3 Bullets and Numbering
6.3.1 Bullets
6.3.2 Numbering
6.4 Layout of shapes
6.4.1 In line with text
6.4.2 With text wrapping
6.5 Blank lines and spaces in Word
6.6 Grouping of shapes and pictures
6.7 Reference links
6.7.1 Link
6.7.2 Cross-reference
6.7.3 Link reference
6.8 Tables
6.9 Character decoration and fonts
Copyright
Chapter 1. Overview
This product consists of (1) a command-line version program (Word2HTML) that converts a docx file to an HTML file, and (2) an add-in built into the Word ribbon.
The target file format in the command-line version is a docx format file edited and saved with Microsoft Word (hereinafter referred to as Word). Old Word document format (extension “doc”) cannot be converted.
1.1 Features of command-line version
Word2HTML is a converter (conversion engine) that reads docx format files and converts them to HTML format. The conversion engine was originally developed using the technology of "Office Server Document Converter", which is a product of Antenna House. It hasn't used the "Save As" feature in Word. The conversion engine runs as a command-line version program of Windows.
The command-line version can be operated directly from a Windows DOS window. When converting a document being edited in Word to HTML from the add-in menu, the add-in launches the command-line version.
The command line conversion operation can be specified with parameters for conversion options. For details, refer to "Chapter 3 Command-line Version". You can also set some options and parameters from the add-in.

1.2 Add-in features
The add-in adds (1) a feature to set conversion options, (2) a feature to convert the contents of the document being edited in Word to a HTML file, and (3) a feature to display the converted HTML file in the associated application as the menu of the Word ribbon.
The conversion process itself in (2) above is performed by the add-in program starting Word2HTML. After converting the docx file to an HTML file, an application such as a browser will open to display the HTML file.
For details, refer to "Chapter 4 Add-in".
The add-in menu has built-in Japanese and English. When the Word language setting is Japanese, the add-in menu will also be Japanese. When the Word language setting is English, the add-in menu will also be English.
Chapter 2. Installation and License Settings
|
V1.2 and earlier versions cannot be installed in the same environment. If you have an older version (V1.1 and earlier) installed, uninstall the older version and then install V1.2. See 2.3 for uninstallation.
|
2.1 Installation procedure
When you download this product on your PC, the ZIP format archive file (xhw122_setup.zip) will be saved in the download destination folder.

To install from a ZIP file, follow the steps order 1 to 10 below.
① When the ZIP format archive file is decompressed, the installer file (xhw122_setup.exe) of this product will be created in the decompression destination folder.

To install from a ZIP file, proceed in the following order 1-10.
② Select the xhw122setup.exe file with the mouse and double-click it. Windows will display a confirmation dialog asking "Do you want to allow this app to make changes to the device?", then click "Yes".
③ The installation program will start and preparations for the installation will start.
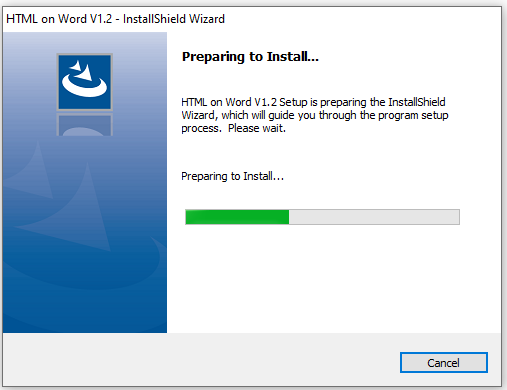
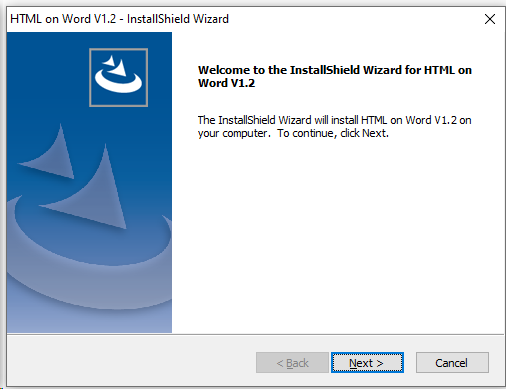
④ When the installation preparation is completed, a dialog confirming the start of installation is displayed.
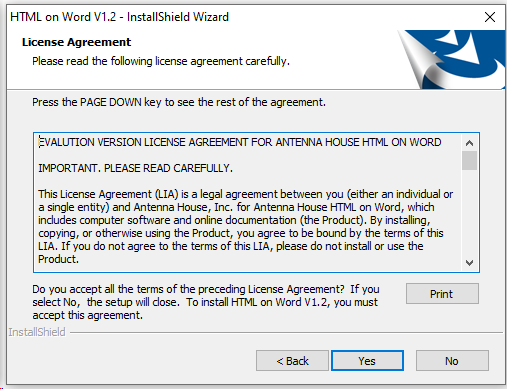
⑤ In the next dialog, the License Agreement for this product will be displayed. Confirm the contents, and if you agree it, click "Yes".
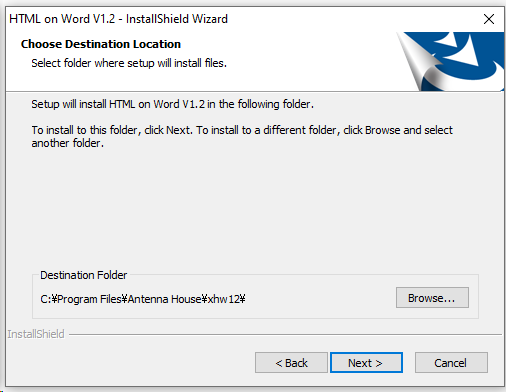
⑥ Select the folder to install this product in the next dialog. The default installation location is following folder:
C:\Program Files\Antenna House\xhw12\
If this is acceptable, click the "Next" button.
To change the installation folder, select the installation folder from the folder selection dialog that appears when you click the "Browse" button on the right.
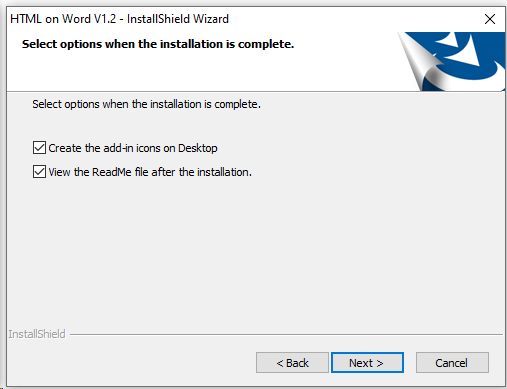
⑦ Next is a dialog for selecting options when the installation is completed. You have two options: See 2.1.1 Installation options for a description of the options.
□Create the add-in icons on Desktop
□View the ReadMe file after the installation
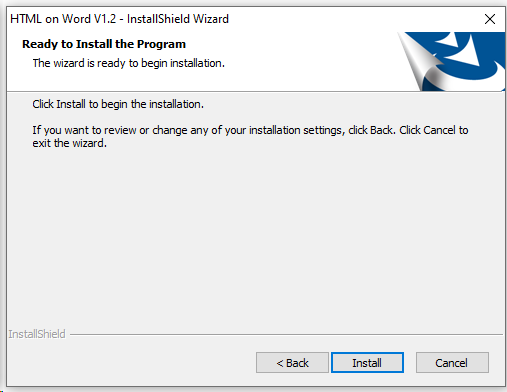
⑧ Click "Next" to display the final confirmation dialog asking whether to start the installation. Click "Install" to start the installation.
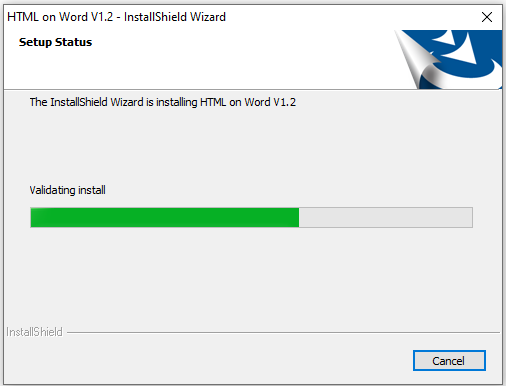
⑨ The installation process is executed.
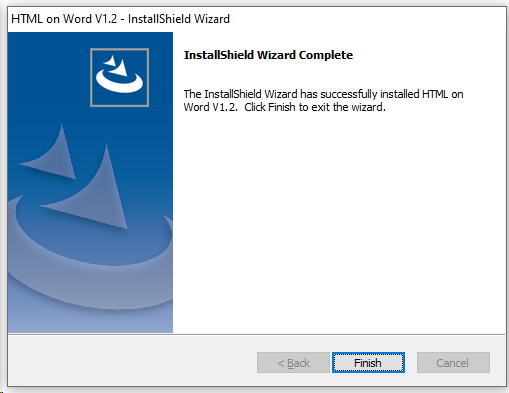
⑩ When the installation is completed, the following dialog will be displayed. Click “Finish” to run the options.
2.1.1 Installation options
① Create the add-in icons on the desktop
If you check the checkbox of this option, two icons will be created on the desktop: the program that install the add-in on the ribbon of Microsoft Word and the program that uninstall the add-in.
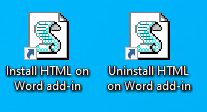
For the Installation/Uninstallation of add-in, refer to "Chapter 4 Add-in".
② View the ReadMe file after the installation
If you check the checkbox of this option, the ReadMe.txt file included in the installer will be displayed on the screen with Notepad when the installation is completed.
2.2 License
There are two types of “HTML on Word” licenses: a 30-day evaluation license and an official license. There is no difference in conversion features between these two types of licenses. The license type is switched according to the license file.
2.2.1 Evaluation version
The evaluation version can be obtained from the product’s web page.
When the installation of the evaluation version is completed, a license file containing the 30-day evaluation license data will be set in the installation folder.
There are no feature restrictions on the evaluation version, and you can use the same features as the official version. However, the usage period of the evaluation version is limited to 30 days, and you will not be able to start the command-line version 30 days after the installation. To continue using it, you need to purchase the official version from the Antenna House.
Antenna House – How to Order
https://www.antennahouse.com/purchase
2.2.2 Official license
When you purchase this product, the official license data (license file) and license certificate will be provided to you. The license file name is “xhwlic.dat”.
To switch to an official license, copy the license file to the same folder as the command-line version of the program (Word2HTML.exe).
The default installation folder for the command-line program is as follows:
C:\Program Files\Antenna House\xhw12
Writing to this folder requires administrator privileges, so if you try to copy the official license file, you will see the following warning dialog:
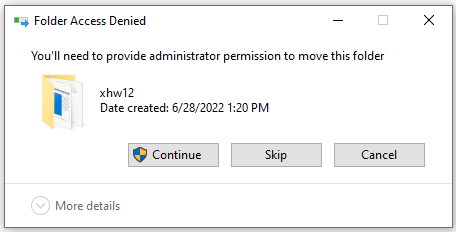
If you do not have administrator privileges, ask the administrator to copy it.
2.3 Uninstallation
To uninstall this product, follow the steps below:
① Add-in uninstallation
If you have an add-in installed in Word, uninstall the add-in first. For information on uninstalling an add-in, refer to "4.1.2 Add-in uninstallation".
Note that if you uninstall the command-line version without uninstalling the add-in, the program that uninstall the add-in will also be deleted and you will not be able to uninstall the add-in from the Word ribbon.
② Command-line version uninstallation
Uninstall the command-line version from the "Apps and Features" screen of "Settings" in Windows.
"Apps and Features" shows a list of applications installed on Windows. Find "HTML on Word V1.2" and click it to enable the "Uninstall" button as shown below.
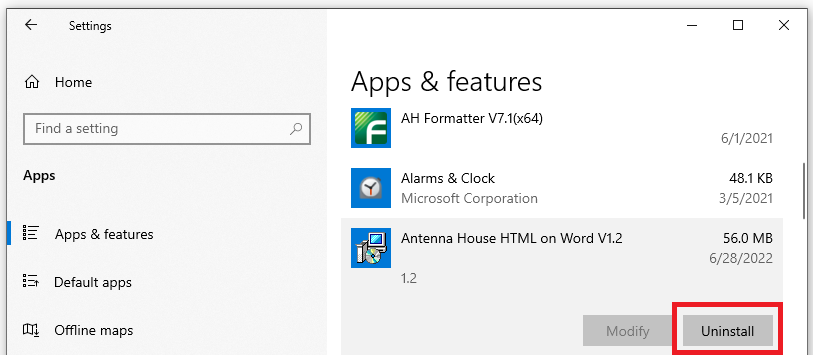
Click "Uninstall" to start the installer and perform the uninstallation process.
Chapter 3. Command-line version
The command-line version is a program used from the Windows command prompt. It provides the feature to convert the input docx file to an HTML file.
3.1 Command-line startup message
When you start the command-line version, the following message is displayed on the Windows DOS window:

(1) Serial number and maintenance deadline
The alphanumeric characters beginning with “XHW12” are the serial numbers.
The meaning of the message following the serial number is as follows:
|
Maintenance Deadline:
|
For official version
|
|
Trial Deadline:
|
For trial/evaluation version
|
(2) How to use
The display following "usage: Word2HTML" is a command line conversion option.
3.2 Conversion options
When running the command line, specify the input file name (required), the output file name (required) and the conversion option after the Word2HTML message.
The following table shows the parameters for conversion options. Specifying input and output files is mandatory, but other parameters are specified only when necessary. If no parameters are specified, the default operation is used.
|
Parameter
|
Description
|
|
<input-file>
|
(Required) Specify the input file name.
|
|
<output-file>
|
(Required) Specify the output file name.
|
|
-clrsettings
|
When this option is specified, option settings already specified in the default setting file, etc. will be cleared.
|
|
-settings <settings-file>
|
Reads the conversion option setting file specified in <settings-file>.
|
|
-xhtml
|
By default, output HTML grammar tags. If -xhtml is specified, XML grammar tags are output.
|
|
-viewport <content>
|
Outputs a meta tag of the following format to <head>.
<meta name=”viewport” content=” Content specified in ‘content’”>
|
|
-endl
|
Outputs a line break at the end of the block tag.
|
|
-emptyP
|
By default, blank lines (lines with line breaks only) in Word are ignored when outputting HTML. When this option is specified, empty <p></p> tags are output as many as the number of blank lines.
|
|
-nonrefiid
|
While editing in Word, a lot of IDs that are not internally referenced may be created. By default, this converter scans IDs that are not internally referenced and deletes them when outputting HTML. Unreferenced IDs will not be deleted when this option is specified.
|
|
-imgwidth
|
Outputs the width of the image.
|
|
-hstrong
|
Ignores the emphasis specified in the heading style.
|
|
-embedimg
|
When this option is not specified (default), images are output to the image folder (see 5.5.1).
When this option is specified, the images are embedded in the body HTML with a data URL.
|
|
-(x|o)math
|
Specifies the output format for formulas edited in the Word formula editor. The following four output formats can be specified:
Unspecified: Output formulas to <img> tags as files in svg file format.
-math: Output formulas to <img> tags as files in MathML format.
-xmath: Output formulas in MathML format markup.
-omath: Output formulas in Word's own Office Math format.
|
|
-throughimg
|
Outputs the image in its original format inserted into Word.
|
|
-pstyle
|
Outputs the style name of the paragraph by setting it as the value of the class attribute.
|
|
-citation
|
Outputs the value of tag in the Citation field by setting it as the value of the href attribute of the <a> tag.
|
|
-textcolor
|
Outputs the color specified for the text as <span style="color:color value">.
|
|
-italic n|t|s
|
Specifies the output method when italics are specified for text:
-italic n: Do not output. (default)
-italic t: Output as <i>tag.
-italic s: Output as <span style="font-style:italic
|
|
-underline n|t|s
|
Specifies the output method when underline is specified for text:
-underline n: Do not output. (default)
-underline t: Output as <u> tag.
-underline s: Output as style="text-decoration-line:underline;">.
|
|
-linethrough n|t|s
|
Specifies the output method when strikethrough is specified for text:
-linethrough n: Do not output. (default)
-linethrough t: Outputs as <del> tag.
-linethrough s: Outputs as <span style="text-decoration-line: line-through;">.
|
|
-encoding <encoding>
|
When you want to specify a character code (encoding method) other than Unicode's UTF-8 for HTML files, specify the encoding method with this parameter.
-encoding Shift_JIS: Output in Shift-JIS (see Note 1)
-encoding UTF-16: Unicode's UTF-16 encoding
Note 1: Because fewer character types are specified in Shift-JIS than in Unicode, Unicode characters that cannot be handled by Shift-JIS are output as &#x character_number; (character_number is a hexadecimal number). Note that the old model-dependent characters added by Microsoft to JIS X0208 (e.g., ①, ②) are treated as Shift-JIS characters.
|
|
-defstyle
|
When this option is specified, the <style> element (element specifying the default CSS style) in <head> is not output.
|
|
-spaceindent
|
When this option is specified, the indentation is converted to a single full-width space when one or more indentations are specified at the beginning of a paragraph.
|
|
-outputbr
|
Instead of enclosing a paragraph in a <p> tag, a <br> tag is output at the end of the paragraph. This is invalid when -xhtml parameter is specified.
|
|
-fileimages
|
Name the folder that stores image files as "destination_file_name.images". See section 5.5.1 for details.
|
|
-css cssfile
|
Links the CSS file. Place the CSS file in a folder on Windows and specify its path. An error will occur if the specified CSS file does not exist. You can optionally specify “media”.
Outputs a link tag of the following format in <head>.
<link href="xxx.css" rel="stylesheet" type="text/css" media="print"> The specified CSS file is copied to the HTML output destination folder.
You can specify multiple pairs of -css and CSS files.
|
|
-js javascript-path
|
Place the script tag in <head> and specify the path (URL) of the JavaScript file in its src attribute. No error will occur even if the specified JavaScript path does not exist.
|
|
-savesettings <settings-file>
|
Saves the specified values of the conversion option parameters at command line execution with the file name specified in <settings-file>. See 3.4.2 for details on setting files.
|
|
-savedefault
|
Outputs the specified values of conversion option parameters at command line execution to the default settings file (def-settings.xml). See 3.4.1 for details on default setting file.
|
3.3 Command line operation examples
The following is an example of using the command line with NewsRelease.docx as the original file name, NewsRelease.html as the destination file name, and sample.news.css as the CSS file.

If the conversion is successful, the following message is displayed and an HTML file is created.

3.4 Setting file
You can specify conversion options in a setting file instead of specifying them on the command line by saving the conversion options in advance in a setting file. There are two types of setting files
- Default setting file
- Conversion option setting file
3.4.1 Default setting file
The default settings file allows you to switch the default operation. The file name of the default settings file is "def-settings.xml" and the file can be saved in either of the following two locations:
- Same folder as the EXE file (Word2HTML.exe)
- Roaming folder
If the default settings file is placed in the same folder as the EXE file, the default values will be the same for all users.
If the default settings file is placed in the Roaming folder, it will be a different default settings file for each user. The default setting file path for the Roaming folder is usually,
C:\Users\USER\AppData\Roaming\AntennaHouse\xhw\1.2\def-settings.xml
When default setting files are located in both two folders, the contents of the default setting file in the Roaming folder takes precedence.
Note that if the default setting file contains ON/OFF type conversion option settings, specifying the same conversion option as an add-in or command line parameter will invert ON/OFF.
When specify the "-savedefault" parameter of the conversion option you can create a default settings file (def-settings.xml) in the Roaming folder. The default settings file is in XML format and can be edited with a text editor.
For example, specifying the following on the command line will create a default setting file with the; (1) output line breaks at the end of block tags (-endl) and, (2) output underlines as <u> tags (-underline t).

In addition, the following specification will create a default settings file that clears all the settings in the default settings file and restores them to the default settings of the program itself.

The following is the default settings file created by specifying "-clrsettings -savedefault" as a conversion option parameter. Parameters with no default values will not be set.
<?xml version="1.0"?>
<word-to-html-settings>
<enable-XHTML enable="false"/>
<viewport content=""/>
<enable-endl enable="false"/>
<enable-empty-paragraph enable="false"/>
<enable-non-reference-id enable="false"/>
<enable-image-width enable="false"/>
<enable-heading-strong enable="true"/>
<enable-embed-image enable="false"/>
<enable-mathml enable="false"/>
<xml-mathml enable="false"/>
<xml-omath enable="false"/>
<through-image enable="false"/>
<enable-pstyle enable="false"/>
<enable-citation enable="false"/>
<text-color enable="false"/>
<output-br enable="false"/>
<style-tag enable="true"/>
<space-indent enable="false"/>
<fil-images enable="false"/>
<italic out="n"/>
<underline out="n"/>
<linethrough out="n"/>
</word-to-html-settings>
3.4.2 Conversion option setting file
The conversion option setting file is a file that saves parameter values for conversion options.
It is read at command line execution by specifying the name of the conversion option setting file.
If you repeatedly convert using the same settings, you can save the conversion options in a settings file so that the next time you convert, you only need to specify the settings file instead of specifying the same options.
The file name of the conversion option setting file is optional.
The conversion option setting file can be created as a file specified by the "-savesettings" conversion option when the command line is executed.
The conversion option setting file is in XML format, so parameter values can be modified using a text editor.
3.4.3 Setting file format
The settings file is an XML file whose root element is "word-to-html-settings" and the items to be set for conversion options are the child element type names. The format of the default setting file and the conversion option setting file are the same. The correspondence between each element type name and the conversion option parameters is shown in the table below.
|
Element type name
|
Attribute
|
Program default value
|
Corresponding conversion option parameter
|
|
word-to-html-settings
|
|
|
enable-XHTML
|
enable
|
false
|
-xhtml
|
|
viewport
|
content
|
|
-viewport
|
|
enable-endl
|
enable
|
false
|
-endl
|
|
enable-empty-paragraph
|
enable
|
false
|
-emptyP
|
|
enable-non-reference-id
|
enable
|
false
|
-nonrefiid
|
|
enable-image-width
|
enable
|
false
|
-imgwidth
|
|
enable-heading-strong
|
enable
|
true
|
-hstrong
|
|
enable-embed-image
|
enable
|
false
|
-embedimg
|
|
enable-mathml
|
enable
|
false
|
-math
|
|
xml-mathml
|
enable
|
false
|
-xmath
|
|
xml-omath
|
enable
|
false
|
-omath
|
|
through-image
|
enable
|
false
|
-throughimg
|
|
enable-pstyle
|
enable
|
false
|
-pstyle
|
|
enable-citation
|
enable
|
false
|
-citation
|
|
text-color
|
enable
|
false
|
-textcolor
|
|
output-br
|
enable
|
false
|
-outputbr
|
|
style-tag
|
enable
|
true
|
-defstyle
|
|
space-indent
|
enable
|
false
|
-spaceindent
|
|
fil-images
|
enable
|
false
|
-fileimages
|
|
italic
|
out
|
n
|
-italic n|t|s
|
|
underline
|
out
|
n
|
-underline n|t|s
|
|
linethrough
|
out
|
n
|
-linethrough n|t|s
|
|
encoding
|
encoding
|
N/A
|
-encoding
|
|
link-css
|
src
|
N/A
|
-css css-file
|
|
link-js
|
src
|
N/A
|
-js javascript-path
|
3.5 Parameters in the add-in menu
Only following two conversion option parameters can be specified in the add-in menu:
- Use specified CSS
- Line break with block tag
Checking the "Use specified CSS" checkbox corresponds to the “-css” parameter specification of the conversion option in the command line version. The command line version allows multiple pairs of “-css” and filename to be specified, but only one can be specified in the add-in.
Checking the "Line break with block tag" checkbox is equivalent to the “-endl” parameter specification of the conversion option.
The add-in does not allow you to specify other conversion options, so use the default settings file (see 3.4.1) to specify them if necessary.
3.6 Error messages
The error messages in the command-line version are:
|
Error message
|
Possible cause
|
|
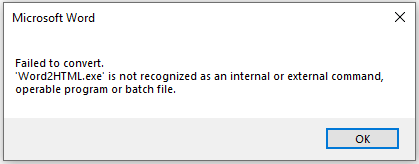
‘Word2HTML’ is not recognized as an internal or external command, operable program or batch file.
|
① The command-line version is not installed normally.
(Countermeasure) Reinstall.
② The path to the folder where the command-line version is installed is not set.
(Countermeasure) In the Windows settings, set the path to the folder in the environment variable.
|
|
“Cannot Open File”
|
The conversion destination file cannot be opened.
(Countermeasure) It is possible that the conversion destination file has been opened with an editor, etc., and editing is locked. In that case, please finish editing.
(Countermeasure) It is considered that the CSS file for which the link is specified does not exist.
|
|
“Input file not found”
|
Input file not found.
|
Chapter 4. Add-in
4.1 Add-in installation/uninstallation
4.1.1 Add-in installation
To install an add-in, close Word and click the “Install HTML on Word add-in” icon on your desktop.
If you did not create an add-in installation icon on your desktop during installation, do the following:
- Find the program for installing the add-in that is copied to the “HTML on Word” installation folder.
- Double-click the add-in installation program file (install.vbs).
4.1.2 Add-in uninstallation
To uninstall an add-in, close Word and click the “Uninstall HTML on Word add-in” icon on your desktop.
If you did not create an add-in uninstallation icon on your desktop during installation, do the following:
- Find the program for uninstalling the add-in that is copied to the “HTML on Word” installation folder.
- Double-click the add-in uninstallation program file (uninstall.vbs).
4.2 “Antenna House” tab
When the add-in is installed, there will be an "Antenna House" tab on the Word ribbon. The “HTML on Word” group on this tab has the following buttons.
- “Convert to HTML” button
- “Use specified CSS” checkbox
- “Line break at block tag” checkbox
- “Help” button

You can use this button and checkbox to convert the document being edited in Word to an HTML file, and check the conversion result with a browser or text editor.
When the "Preferred Languages" is "English" in the "Language" tab of the Windows settings "Time & Language", the tab names and menus in Word will be English as shown in the figure. If this happens, the tab name of the add-in will be “Antenna House”, and the command name and tooltip message are in English.
If you change the "Preferred languages" to "Japanese" in the "Language" tab of the Windows settings "Time & language", the tab names and menus in Word will be in Japanese. If this happens, the tab name of the add-in will be "アンテナハウス", and the command name and tooltip message will also be in Japanese.
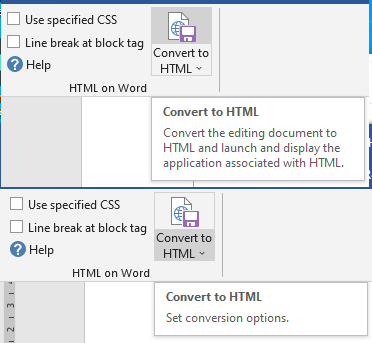
4.3 “Convert to HTML” button
The "Convert to HTML" button is divided into two commands, the "Convert to HTML" command at the top and the "Conversion options" command at the bottom.
4.4 Convert to HTML
Click the top of the "Convert to HTML" button to launch the "Convert to HTML" command. The operation of "Convert to HTML" is as follows:
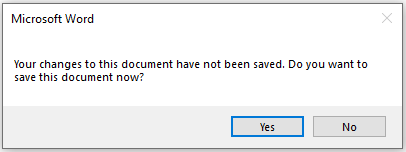
① When the docx document being edited is updated, a dialog prompting you to save the changed document is displayed before the conversion starts.
- When the HTML save destination folder is not set, the dialog for selecting the save destination folder is displayed. The displayed dialog has the same contents as "4.4.2 Changing the conversion destination folder", so see also that section.
- Convert the docx document being edited to HTML format.
* For the conversion process, start the installed Word2HTML command-line version separately. For the command-line version, refer to "Chapter 3 Command-line version".
- When the conversion is completed normally, the application associated with the extension html is started by the Windows function and the conversion result is displayed.
4.4.1 Application to display the conversion result
When "Convert to HTML" is completed, the HTML file will be displayed in the application associated with the extension html in Windows.
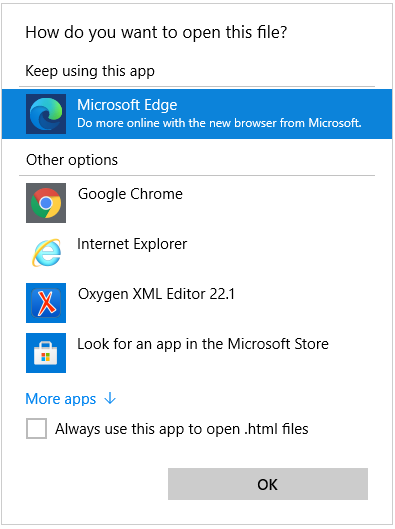
When "Convert to HTML" is executed for the first time, a dialog for selecting the application (browser or editor) to display the file from the applications associated with the extension html in Windows may be displayed.
However, depending on the operating environment of Windows, the application selection dialog may not be displayed. This dialog is displayed on Microsoft Windows, and the add-in does not control the display/non-display of this dialog.
To change the application associated with the html extension on Windows:
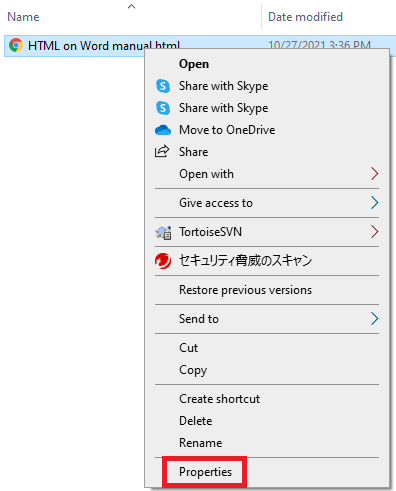
1. Select the HTML file in File Explorer.
2. Select Properties from the right-click menu
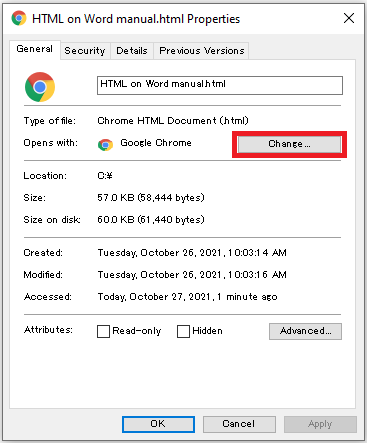
3. From the Properties dialog, click the "Change" button in the “Opens with” section.
- Select the application in the "How do you want to open .html files from now on?"
- Click “OK” to close the dialog.
4.4.2 Changing the conversion destination folder
Click the bottom of the "Convert to HTML" button to display the "Select destination folder" command.
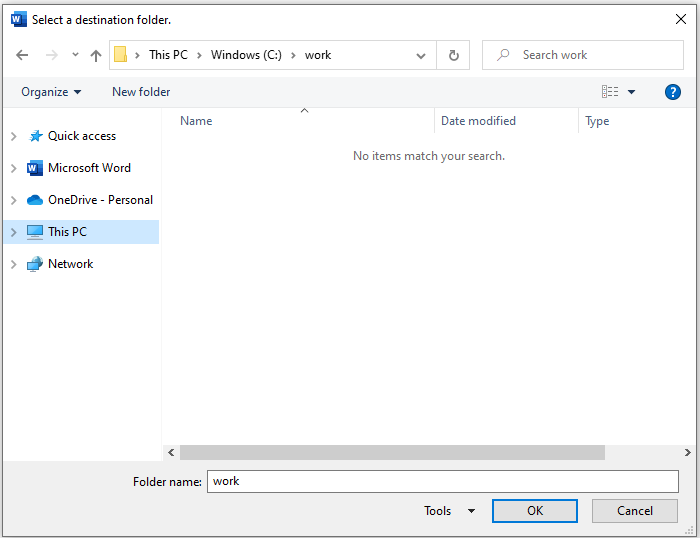
Select the folder where you want to view the conversion results and click “OK”.
From the next time, the conversion result will be saved in the selected folder.
4.4.3 “Use specified CSS”
You can change the layout of the HTML file with CSS. Set the link to the specified CSS file with this option to the converted HTML file.
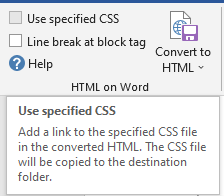
If you check the "Use specified CSS" checkbox, a dialog for selecting a CSS file will open. Select the CSS file you want to link to.
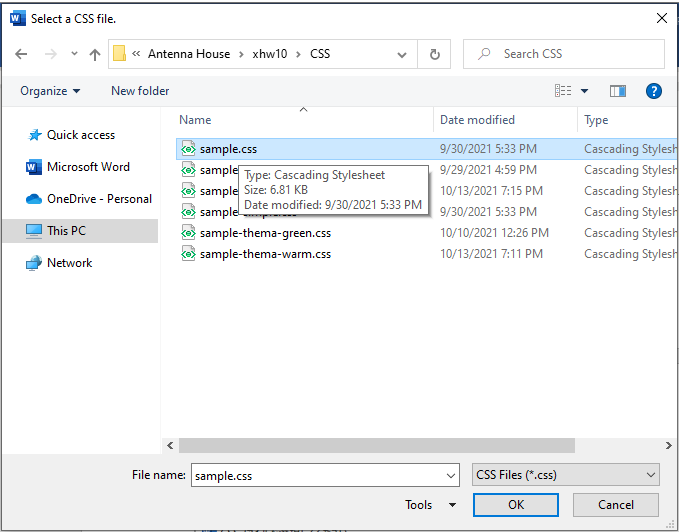
A sample CSS file is included with this product. The sample CSS file is copied to the CSS folder in the folder where this product is installed. In addition to the CSS file included with this product, you can link the CSS file you prepared.
The linked CSS file will be copied to the same folder as the converted HTML file.
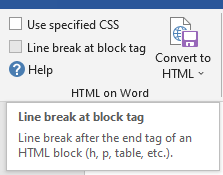
4.4.4 “Line break with block tag”
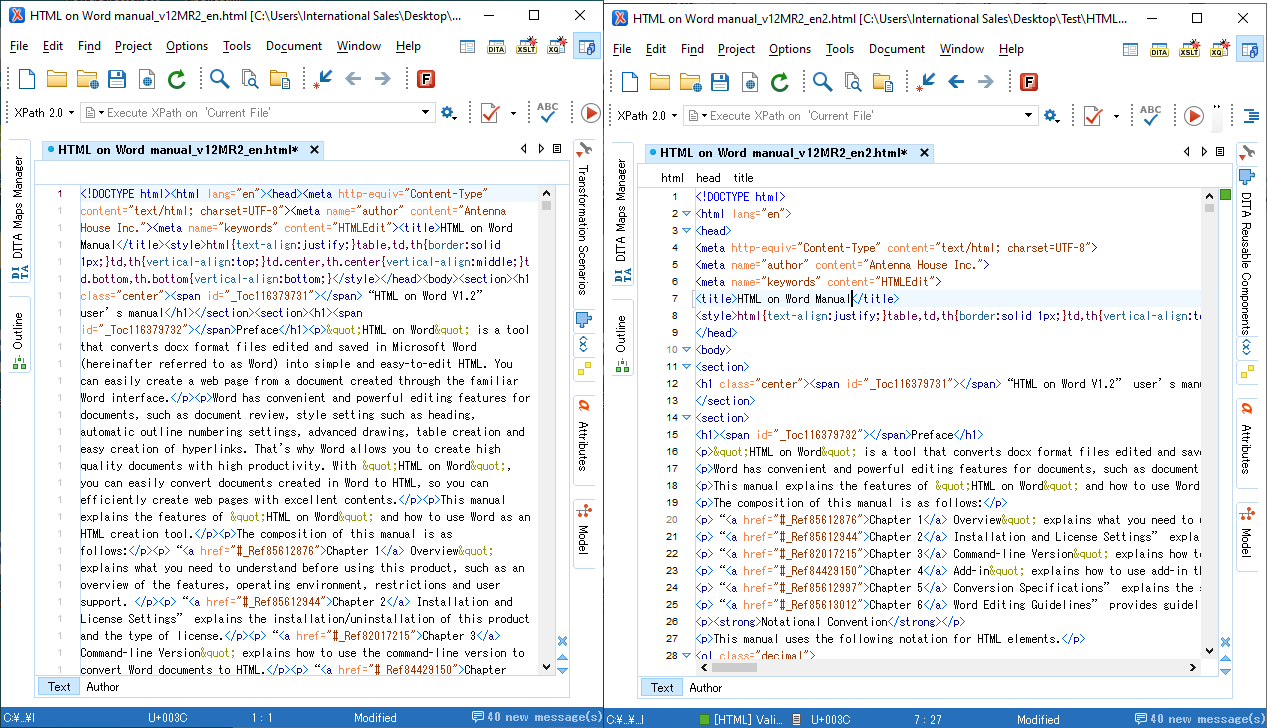
If you check the "Line break at block tag" checkbox, a line break will be output after each block end tag. It makes no difference when viewing the converted HTML file in a browser, but it is useful when viewing the HTML file in a text editor to view and edit tags.
The following figure compares the display of an HTML file without line breaks in block tags (default) and the display of an output HTML file with the "Line break at block tag" checkbox checked, when read in a text editor.
4.4.5 Help
Click the “Help” button to display web help. Help can be found on the Antenna House web page. The URL is:
- (Japanese)https://www.antenna.co.jp/xhw/help/ja/
- (English)https://www.antenna.co.jp/xhw/help/en/
4.5 Error messages
The add-in "Convert to HTML" launches the command-line version (Word2HTML).
If an error occurs during conversion, the error message output by the command-line version will be displayed in the dialog.
For example, the following error message is a message that the Word2HTML program cannot be found in Windows. The cause may be that the command-line version is not installed normally, or the path to the folder where the command-line version is installed is not set.
For the error message of the command-line version, see “3.6 Error messages”.
Chapter 5. Conversion specifications
This section describes the conversion specifications when converting from Word to HTML on the command-line version.
5.1 Original documents
The original document file format of the conversion source is docx file only. doc format files saved in old Microsoft Word are not subject to conversion processing.
5.2 Version of destination HTML
By default, tags that conform to the HTML specifications are output.
◎HTML specification reference
If you specify “-xhtml” parameter as a conversion option, XHTML 1.0 compliant tags will be output.
In addition, the tag samples of the following conversion specifications explain the state of conformance to the HTML specifications.
5.3 Root, head and meta-information
|
Conversion source
|
Conversion destination (HTML tag)
|
Remarks
|
|
Root
|
<!DOCTYPE html>
<html lang="">
|
Japanese ver.: lang=”ja”
English ver.: lang=”en”
See Note 1 for language judgment
|
|
Character encoding
|
<meta http-equiv="Content-Type" content="text/html;
charset=UTF-8">
|
UTF-8 is the basic format. In addition, Shift_JIS and UTF-16 can be specified as conversion option parameters.
|
|
Info: Title
|
<head>
<title>~</title>
</head>
|
Get the title information from the contents of the property "Title" on the Word "Info" tab.
|
|
Meta-information
|
<head>
<meta name=”” content=“”>
author, description, keywords
|
Converts the property items in the Word "Info" tab to name attribute values and the settings to content attribute values. the correspondence between the name attribute values and content attribute values is as follows:
author: Author
description: Comment
keywords: Tag
|
|
CSS link
|
<link href="xxx.css" rel="stylesheet" type="text/css" media="print">
|
xxx.css is the specified CSS file name. The media attribute is optional.
|
|
Default style
|
<head>
<style>CSS style</style>
</head>
|
Sets the default CSS to be applied to the entire HTML. The two settings are as follows:
(1) Paragraph text alignment (see 5.9)
(2) Border attribute of table.
However, it is not output when linking external CSS.
|
|
JavaScript specification
|
<head>
<script src=”xx/yy.js”></script>
</head>
|
xx/yy.js is the JavaScript path
|
Note 1 Language judgement
Estimated from the percentage of full-width characters in a Word document and the default style language setting. Note that estimates may not be correct.
5.4 Block elements
|
Conversion source
|
Conversion destination (HTML tag)
|
Remarks
|
|
Body text
|
<body>-</body>
|
|
|
Title style
|
When outline level 1 is set for the title style.
|
<h1>-</h1>
|
Some of the title styles registered in Word's Style Gallery have outline level 1 set, while others do not.
|
|
When the title style does not have an outline level set.
|
<p>-</p>
|
|
Paragraph
|
<p>content</p>
|
By default, lines with only line breaks are ignored.
The -emptyP option outputs lines with only line breaks as empty <p></p>.
|
|
Forced line break
|
<br >
|
|
|
Forced page break and column break
|
Ignored.
|
|
|
Section
|
When the <h> start tag is at the beginning or only the <h> tag with a lower rank before it, the <section> start tag is output before the <h> start tag. When there is a <h> with a higher rank before it, output the </section>.
|
Create a tree structure with the <section> tag before <h>.
|
5.4.1 Heading styles and outline levels
|
Conversion source
|
Conversion destination (HTML tag)
|
Remarks
|
|
Heading 1 to Heading 6 (Heading style)
|
<h1>-<h6>
|
Set the heading style outline level to the heading rank tag.
|
|
Heading 7 to Heading 9 (Heading style)
|
<p class=”l7”>~
<p class=”l9”>
|
Heading style outline levels 7 and 8 are set as class attributes of a paragraph.
|
|
Paragraph outline levels 1 to 6
|
<h1>-<h6>
|
Set the paragraph outline level to the heading rank tag.
|
|
Paragraph outline levels 7 to 9
|
<p class=”l7”>~
<class=”l9”>
|
Paragraph outline levels 7 and 8 are set as class attributes of a paragraph.
|
|
Bullets (with bullet symbol)
|
<ul>/<li>
|
Remove bullet symbols.
|
|
When there is one paragraph with numbering.
|
<p> convert numbering to text.
|
|
|
When paragraphs with numbering are consecutive.
|
<ol>/<li>
|
Remove numberings.
|
|
The same applies to the second and lower layers of bullets or paragraph numbering as in the first layer.
|
|
|
5.4.2 Heading outline numbers
When an outline number is added to a paragraph for which a heading style is specified, the outline number is enclosed in a <span> tag with the class attribute value “number”, and converted to the content string of the <h> tag after specifying the class attribute value number for the outline number. If there is a space between the outline number and the heading text, the space is output as a single-byte space, or if there is a tab, the tab is deleted and a single-byte space is inserted instead.
5.4.3 Lists
Paragraphs with Word lists are converted to HTML lists (unordered lists) (<ul>/<li>). At this time, the bullet symbols in Word paragraphs are removed.
5.4.4 Paragraph numbering and ordered lists
Paragraphs that have been numbered at the beginning of a paragraph using Word's paragraph numbering feature (numbered paragraphs) are converted as follows:
- When a numbered paragraph is preceded or followed by an unnumbered paragraph or line break, the numbered paragraph is output as an HTML paragraph (<p> tag). In this case, the paragraph number is enclosed in a <span> tag with the class attribute value specified as number, and then output as normal text.
- When two or more numbered paragraphs are consecutive, they are output to an HTML ordered list (<ol>/<li> tags):
- If numbered paragraphs are arranged in a hierarchy and the first and next paragraphs are adjacent to each other, even if they are at different levels, they are considered to be consecutive.
- Sets the type of numbering specified in the Word document as the value of the class attribute of the <ol> tag.
5.4.5 Paragraph style name (optional)
By default, paragraph style names are not output.
If you specify “-pstyle” parameter as a conversion option, the name of the paragraph style is output as the value of the class attribute of the <p> or <h> tag when a paragraph style is specified in a Word paragraph. When paragraph formatting is specified without using the paragraph style feature, the value of the class attribute is not set.
5.5 Figure and figure arrangements
5.5.1 Output folder and file name for illustrations
- The illustrations inserted into the docx document are extracted from the docx document and the that paths are set to the value of the src attribute of the <img> tag in HTML. The default folder for extracted illustration files is "image". If the "-fileimages" parameter of the conversion option is specified, a folder named "destination_file_name.images" is created for each output HTML file. The file names are automatically generated with sequential numbers.
- Illustrations linked to a docx document will have the path of the linked file set to the value of the src attribute of the <img> tag in HTML. Linked illustraion files will not be copied or moved. The illustration paths are converted to relative paths from the output HTML file. If the original docx document and the folder of the linked illustraions have been moved, the path may not be set to a proper relative path.
Note that if the "-embedimg" parameter is specified, the images will be embedded in the HTML file.
5.5.2 Image and shape formats
By default, images are converted to PNG or JPEG format, and AutoShape, line shapes inserted in Word, and shape files in EMF and WMF formats are converted to SVG format for output.
If you specify the “-throughimg” parameter in the conversion option, images and shapes inserted into Word in GIF, EMF or WMF formats are saved to the illustration output folder in their original formats without file format conversion.
5.5.3 Layout Options
Saves the layout option type specified in Word format as the <img> class attribute.
|
Conversion source
|
Options
|
class attribute
|
|
In Line with Text
|

|
class="inline"
|
|
With Text Wrapping
|
Common for “With Text Wrapping”
|
class="block"
|
|
Square

|
class="block square"
|
|
Tight

|
class="block tight"
|
|
Through

|
class="block through"
|
|
Top and Bottom

|
class="block top-bottom"
|
|
Behind Text

|
class="block behind"
|
|
In Front of Text

|
class="block front"
|
[Notice]
In CSS, the display property specifies whether the figure layout is inline or block. Since the default value of the display property is inline, even if you set “With Text Wrapping” in the Layout Options in Word, it may be displayed as “In Line with Text” in the browser. In such a case, specify as follows in CSS:
img.block {
display: block
}
5.5.4 Position to output the figure with “With Text Wrapping” specified
The output position of the img tag for an illustration that specifies string wrapping is after the end tag of the block that sets the anchor in headings and paragraphs. However, in bulleted items, it is just before the end tag. For details, refer to “6.4 Layout of shapes”.
5.6 Formula
Formulas edited in Word's formula editor are output as SVG format files using <img> tags by default.
Depending on the conversion option parameters, you can convert to an external file in MathML format, convert to MathML format markup, or output as Office Math markup which is the Word's unique representation of Office Open XML formulas.
|
Parameter
|
Output format
|
|
Unspecified
|
Output formulas to <img> tags as svg format files.
|
|
-math
|
Output formulas to <img> tags as MathML format files.
|
|
-xmath
|
Output formulas as mathML format markups.
|
|
-omath
|
Output formulas in Word's own Office Math format.
|
5.7 Tables
|
Conversion source
|
HTML element
|
Example
|
|
Table
|
<table>
<tbody>
<tr>
<td>
|
|
|
Merge
|
Cell merge
|
<td colspan="n">
|
“n” is the number of horizontally merged cells.
|
|
Row merge
|
<td rowspan="n">
|
“n” is the number of vertically merged cells.
|
5.7.1 Table header row
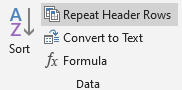
To output the table header tag (table header: thead), set either of the following in the first row of the table.
- Select the first row of the table and turn on "Repeat Header Rows" in "Table Tools: Layout" on the Word ribbon.
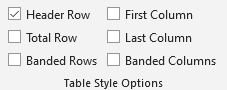
- Check only "Header Row" in "Table Style Options" in "Table Tools: Table Design" on the Word ribbon.
|
Conversion source
|
HTML element
|
Description
|
|
“Table Tools: Layout”
“Table Tools: Table Design”: “Table Style Options”
|
<thead><tr><td>…</td></tr></thead>
|
The first row of the table is enclosed with <thead>.
If you turn on “Repeat Header Rows”, the header rows will be repeated on each page whren the table spans pages. If you want to avoid this, turn off "Repeat Header Rows" and check "Header Row" in “Table Style Options” in “Table Design”.
|
5.7.2 Table header column
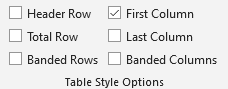
Select the first column of the table and check only "First Column" in "Table Style Options" in "Table Tools: Table Design" on the Word ribbon to set the cell of the first column as the header cell.
|
Conversion source
|
HTML element
|
Description
|
|
“Table Tools: Table Design”: “Table Style Options”
|
<tr><th>…</th></tr>
|
The cells in the first column of the table are marked up with the header cell tags.
|
5.8 Inline elements
5.8.1 Font group
|
Font group
|
HTML element
|
Example
|
|
Bold
|
strong
|
Note that the bold set in the heading style is ignored.
|
|
Italic
|
Ignored by default. Output with <i> tag or the following CSS style specification in the conversion options:
<span style="font-style:italic;>
|
|
|
Underline
|
Ignored by default. Optionally set the <u> tag or the following CSS style specification for output:
<span style="text-decoration-line:underline>
Note that the anchor text of the link is not underlined.
|
|
|
Strikethrough
|
Ignored by default. Output with <del> tag or the following CSS style specification in the conversion options:
<span style="text-decoration-line:line-through;">
|
|
|
Subscript
|
sub
|
|
|
Superscript
|
sup
|
|
|
Text Effects and Typography
|
Ignored.
|
|
|
Text Highlight Color
|
Ignored.
|
|
|
Font Color
|
Ignored by default. Output with the following CSS style specification in the conversion options:
<span style="color1;color value">
|
<span style="color:red;">text color red</span>, <span style="color:#00B050;">text color green</span>
|
|
Character Shading
|
Ignored.
|
|
|
Enclose Characters
|
Ignored.
|
|
|
Font
|
Ignored.
|
|
|
Font Size
|
Ignored.
|
|
|
Case
|
Ignored.
|
|
|
Phonetic Guide
|
ruby rp rt
|
<ruby>紫陽花<rt>あじさい</ruby>
|
|
<ruby>漢<rp>(</rp><rt>かん</rt><rp>)</rp>字<rp>(</rp><rt>じ</rt><rp>)</rp></ruby>
|
|
Character Border
|
Ignored.
|
|
5.8.2 Links and cross-references
|
References
|
HTML element
|
Example
|
|
Link (external URL)
|
<a href=”Link URL”>label</a>
|
“Link” on the “Insert” tab on the ribbon.
|
|
Link (id)
|
<a href=”#id値”>label</a>
|
|
|
Cross-reference
|
<a href=”#id value”> label</a>
|
References in Word documents by "Cross-references" in the "References" tab on the ribbon.
|
|
<span id="">
|
|
id value
|
<span id=”id value”></span>
|
Link to bookmark "here"
|
5.9 Paragraph text alignment
Set the paragraph alignment set to the “Normal” style in the style gallery on the “Home” tab of the Microsoft Word ribbon to the <style> element of the <head>. However, when left alignment is set in the "Normal" style, text-align:start is the default value in CSS, and it is not necessary to specify the alignment, so it is not set.
Note that <style> in <head> is not output if “-defstyle” parameter is specified in the conversion option (see "3.2 Conversion options").
|
Paragraph alignment
|
Elements and class attributes
|
Example
|
|
Alignment of "Normal" style
|
Align Left
|
No settings.
|
<style><style>
|
|
Center
|
text-align:center
|
<style>html{text-align:center;}
|
|
Align Right
|
text-align:end
|
<style>html{text-align:end;}</style>
|
|
Justify
|
text-align:justify
|
<style>html{text-align:justify;}</style>
|
|
Distributed
|
text-align:justify;
text-justify:auto;
|
<style>html{text-align:justify;text-justify:auto;}</style>
|
If you specify the paragraph alignment other than “Normal” in the "Paragraph” group on the "Home" tab of the ribbon, the following class attributes will be set in the heading rank tag (h1 to h6) or p tag.
|
Paragraph alignment
|
Elements and class attributes
|
Example
|
|
Align Left
|
class="start"
|
<p class=”start”>…</p>
|
|
Center
|
class="center"
|
<p class=”center”>…</p>
|
|
Align Right
|
class="end"
|
<p class=”end”>…</p>
|
|
Justify
|
class=”justify”
|
<p>…</p>
|
|
Distributed
|
class="distribute"
|
<p class=”distribute”>…</p>
|
5.10 Text box
- The contents of a text box without a border are converted as the text box did not exist.
- Text boxes with borders are converted to line art (SVG image) and the file name is output in the src attribute of img.
5.11 Endnote
An anchor tag is set to an endnote symbol indicating the location of the endnote in the body text, and the id of the endnote is set to the value of the href attribute of the anchor tag.
The text of the endnote is output at the end of the document, at the same level as the paragraphs at the end of the document except for the endnote. The number of the endnote is set to id="endnote-n" (n is a number).
Chapter 6. Word Editing Guidelines
6.1 Principle of content and style separation
6.1.1 What is web page content and layout separation?
The actual contents of a web page, such as text, images, tables, etc., is called “contents”. In addition, the “layout” is to specify the layout of the block, the margin around the block, whether to surround it with a border, its color, the font to be displayed, the size of the characters and other appearances.
When creating a web page, the contents are marked up with the corresponding tags in HTML and the layout is specified by CSS. In latest HTML, the basic principle is to separate content from layout.
6.1.2 Word is a mixture of content and layout
On the other hand, when editing a document in Word, the text format and image layout are specified directly on the text or image while editing on the screen. Word takes a method called "WYSIWYG" that follows the layout on the screen when the document is printed, and the way of thinking about the document layout is fundamentally different from HTML.
This makes it very difficult to create a web page from a document created in Word. In Microsoft Word, if you select "Web Page" as the file type to save in "Save As" of "File" on the ribbon, you can save it in a Web format that can be displayed in a browser at first glance. Unfortunately, the web page format saved in Word is completely useless as it is.
The reason for this is that Word attempts to reproduce the layout including appearance and placement for printing specified on the screen during editing on the web page.
6.1.3 This product ignores Word layout specification in principle
In order to solve these problems, this product discards all layout specifications of documents created in Word and expresses the contents with pure HTML tags.
To master this product, you will need to first understand this basic.
As a general premise, you don't write HTML tags directly in Word, but understanding HTML tags is essential for the result of conversion from a Word document to be proper HTML. Then, you need to edit the Word document, keeping in mind that the Word styling you are currently editing will be converted to what HTML tags.
From this perspective, this chapter describes what you should be aware of when editing a Word document.
6.1.4 Things to avoid when creating Word documents
Avoid the following editing operations on the Word editing screen:
- Adjust the start position of the line with a space character.
- Start a new line in the middle of the line where the sentence continues.
For example, suppose you want to edit a bulleted item that spans two lines by entering a line break at the end of the first line and inserting a space at the beginning of the second line to align the beginning of the line. In this case, even if there is no problem when printing on paper or converting to PDF, but the connection of sentences will be broken when converting to HTML.
6.2 Output the HTML heading rank tag
HTML heading rank tags (h1 to h6) are tags for representing headings. From the SEO point of view, it is sometimes explained that the h1 tag that represents heading rank 1 usually represents the heading as the entire title only once at the beginning of the document. In that case, use "Heading 1" (converted to h1 tag) only once at the beginning of the Word document.
However, as HTML, there is no problem even if the h1 tag appears multiple times in the document. When creating such HTML, you can specify "Heading 1" as many times as you like.
In this product, sections are hierarchized according to the rank of the heading rank tag. When using h1 as a large heading, h2 as a middle heading, and h3 as a subheading, specify that heading 1, heading 2 and heading 3 appear in this order in a Word document. You can repeat heading 2 under heading 1 and heading 3 under heading 2.
6.2.1 Set the Word heading style
When adding headings in Word, apply the "Heading Style" built into Word. Word's "Heading Style" is available from Heading 1 to Heading 9.
The Word2HTML converter associates HTML heading rank tag h1 with heading style 1. Set heading rank tags h2 to h6 for heading styles 2 to 6.
[Notice] Depending on the theme of Word, the outline level (described later) may not be set in the heading style. When you use such a heading style in a Word document, setting the heading style does not set a heading rank tag for that paragraph.
You can determine if a paragraph has an outline level by hovering the cursor over the paragraph. Paragraphs with an outline level will have  mark on the left side of the paragraph when you hover over the cursor.

6.2.2 Set the title
One of Word's built-in styles is "Title". The title style may have the setting of "Outline Level 1". If you apply such a title style to a paragraph in a Word document, the Word2HTML converter will set the h1 tag on that paragraph.
6.2.3 Set the paragraph outline level in Word
Word has a feature called Paragraph Outline Level, which allows you to set paragraphs in 9 levels. Also, the outline level of the outline edit paragraph is set in the “Paragraph” dialog of the “Paragraph” group on the “Home” tab of the ribbon.

The “Paragraph” dialog is displayed by clicking the arrow mark at the bottom right of the paragraph group.
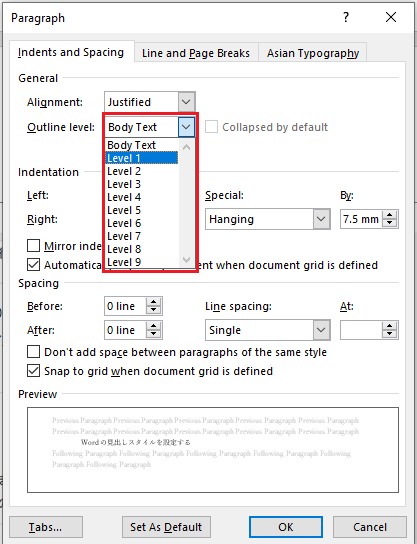
The Word2HTML converter maps outline levels 1 to 6 to HTML heading rank tags h1 to h6. In other words, a paragraph for which outline level 1 is set in Word will have HTML heading rank 1 (h1).
6.3 Bullets and Numbering
6.3.1 Bullets
”Bullets” in the “Home” tab on the Word ribbon creates paragraphs with symbols at the beginning of the line.
In Word, the Bullet Library allows you to change the look of the bullets.
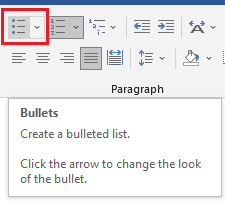
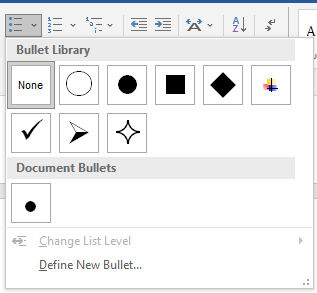
Many of these bullets are displayed using a special Word font and may not be displayed correctly in HTML. For this reason, the Word2HTML converter removes the bullets and then converts them to HTML unordered bullets. In HTML, use CSS to set bullets.
Note that blocks with bullets specified in Word look like HTML unordered bullets. However, inside Word, each item is formatted as a paragraph with a bullet. The Word2HTML converter analyzes the parts where "bullets" are set when editing Word and converts them to HTML unordered bullets. Depending on how you specify the paragraph format, bullets may not be converted to HTML unordered bullets. In this case, try changing the paragraph format.
6.3.2 Numbering
"Numbering" in the “Home” tab on the Word ribbon is a function that automatically numbers the beginning of a paragraph in the selected numbering format.
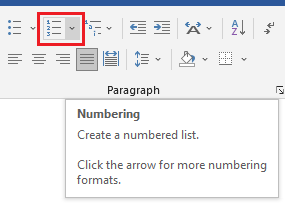
Blocks with numbering look like HTML ordered bullets.
However, Word does not have a style of numbering bullets. Paragraphs with Word numbering are saved as paragraphs with numbers at the beginning of each paragraph item.
The Word2HTML converter programmatically determines whether to convert the specified "numbering paragraphs" to ordered bullets in HTML or numbering paragraphs. The judgment criteria are as follows:
- When consecutive two paragraphs with numbering are set in a Word document, the ordered bullets are set.
- When a single paragraph with numbering is set in a Word document, the number is converted to the normal character at the beginning of the paragraph.
This judgement may not always work, so if it doesn't work as expected, try editing the paragraph in Word.
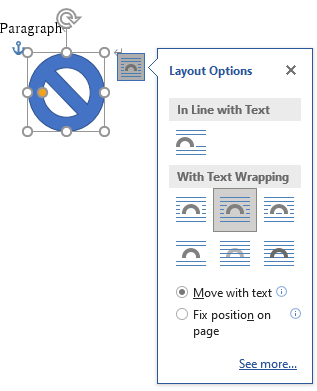
6.4 Layout of shapes
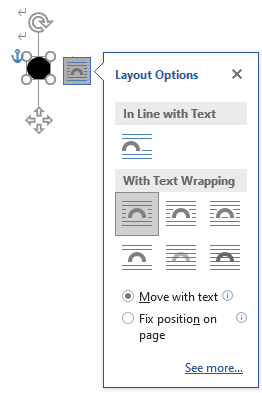
The option to layout a figure in Word (Layout Options) can be selected by right-clicking the target figure to display options (see the following figure).
6.4.1 In line with text
“In line with text” is to layout an image between characters as if it were single character, and the position moves together with the characters before and after. The image with “In line with text” specified is placed between characters like ( ) in HTML.
As a result of converting to HTML, the attribute of class=”inline” is set in the img tag.
6.4.2 With text wrapping
Images with “With text wrapping” specified will have an anchor mark when edited in Word.
A. Images with anchor marks in headings and paragraphs are output just after the end tag of headings and paragraphs, and the attribute of class=”block” is set in the img tag.
In the following example, the image anchor mark is at the beginning of the heading.
Converting this to HTML will output an img tag between the end tag of the heading rank and the start tag of the next paragraph, as shown below.

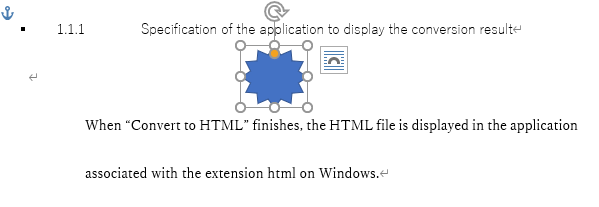
In the following example, the image anchor mark is at the beginning of the paragraph.

Converting this to HTML will output an img tag just after the end tag of the paragraph, as shown below.

In this example, even though the paragraph text is at the back of the figure on the Word display, when converted to HTML, the img tag is output after the paragraph. Word places images on paper, so if an image doesn't fit well on one page, it may be placed on the next page. Even in such a case, when converting to an HTML file, the img tag will be placed after the paragraph with the anchor mark.
B. For images with an anchor mark on a bulleted item, the img tag is output just before the end tag of the bulleted item.
In the following example, the image anchor mark is at the beginning of the first item in the bulleted list.
Converting this to HTML will output the img tag just before the end tag of the first bulleted item, as shown below. (This is because if you put an img tag after the end tag of a bulleted item and between the start tag of the next bulleted item, an HTML syntax error will occur.)

6.5 Blank lines and spaces in Word
The default conversion of “HTML on Word” ignores blank lines (lines with only line breaks at the beginning of lines) and page breaks in Word documents. Also, Word expects to print on paper, so if a figure or table does not fit on the page, it will be sent to the next page, leaving a large space. These spaces are ignored when converting to HTML.
You don’t need to worry about the spaces and blank lines that will be created on the layout on the Word edit screen.
6.6 Grouping of shapes and pictures
In Word, you can place shapes and images on paper. If you want to combine these shapes and images into one in HTML, group them in Word.
If you just place multiple figures in the same position on the screen of the Word document you are editing, the figures will be disjointed when converted to HTML.
6.7 Reference links
There are two ways to set a reference link in Word: "Link" and "Cross-reference" in the ribbon "Insert".
6.7.1 Link
You can set an external URL or a link to the inside of Word in "Link" on the "Insert" tab on the Word ribbon.

6.7.2 Cross-reference
“Cross-references” on the “Insert” tab on the Word ribbon allow you to set links to headings, diagrams, tables, and paragraphs with numbering inside Word.

6.7.3 Link reference
Links can be referenced to external URLs or bookmarks inside the document. Bookmarks can be added, deleted, etc. in the “Bookmark” on the "Insert" tab of the Word ribbon. The following is an example of a bookmark.
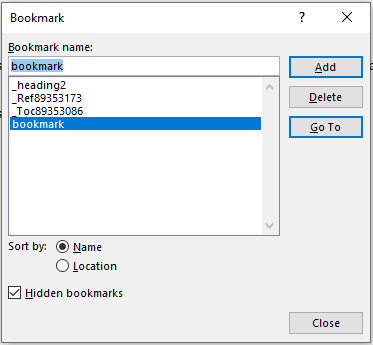
Four bookmarks are displayed in the above dialog, and the bookmark types are as follows.
- Items in the table of contents created by automatic generation on Word are bookmarks starting with "_Toc".
- References set in “Cross-reference” start with "_Ref" bookmarks.
- "_heading 2" at the reference of the document internal link.
- "bookmark" is the bookmark added in the bookmark dialog
When converted to HTML, the bookmark will be converted to <span id=”bookmark name”></span>.
|
[Example] A bookmark named “here” is set here.
|
6.8 Tables
Converts a table created by the table function of Word to an HTML table tag.
When converting a table to HTML, it does convert table cell merging, but ignores settings such as table width, border thickness, background and text alignment in the table.
You will need to specify these settings with CSS for the output HTML.
6.9 Character decoration and fonts
Of the features that can be set in the "Home" font group on the Word ribbon, “Bold”, “Superscript” and “Subscript” are converted to the <strong>, <sup> and <sub> HTML tags.
Other than that, "Italic", “Underline”, “Strikethrough”, “Font Color”, “Font” and “Font Size” are ignored during conversion.
Copyright
|
“HTML on Word” user’s manual
Version: 1.2.2
Publishing date: October 12, 2022
Publisher: Antenna House, Inc. 2-1-6, Higashi-nihonbashi, Chuo-ku, Tokyo
Copyright ©2021-2022 Antenna House, Inc.
This manual was edited with Microsoft Word 2019 and converted to HTML with “HTML on Word”.
|
to TOC